
HomeGrown Solution: Simulated CVC Line for Blood Sampling
Title
Simulated CVC Line for Blood Sampling
Submitted by
Ciara Berry
HomeGrown Solution Number
Category
Identification of the Problem
A significant number of simulators lack the necessary functionality to effectively facilitate central line blood sampling, as they are predominantly designed for central line dressing change demonstrations. This limitation presents a challenge in health care simulation, as it restricts learners from gaining hands-on experience with essential clinical procedures, potentially impacting their preparedness and confidence in performing central line blood draws in real patient care settings.
Unique Idea
To solve this problem, I created a low-cost simulated central line that allows learners to practice drawing blood—something that many commercial simulators don't support. Most available models are focused only on dressing changes and don't provide the hands-on experience needed for blood sampling. My solution is simple, affordable, and easy to replicate, making it ideal for programs with limited resources. It gives students the chance to build confidence and competence in a key clinical skill, helping them feel more prepared when they encounter central lines in real patient care.
Objectives
- Describe the design and construction of a low-cost, functional central line simulator that enables learners to perform blood draws in resource-limited simulation settings.
- Explain how the model supports skill development and clinical confidence in nursing students by providing realistic, hands-on practice with central line procedures.
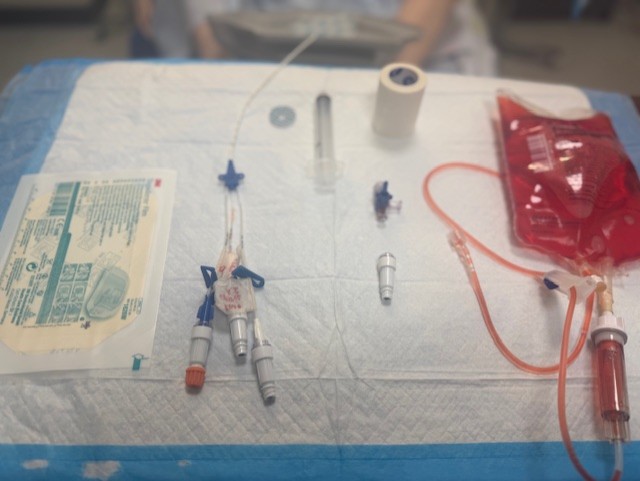
Supplies/Ingredients
- 500 cc bag of fluid
- secondary IV tubing
- 3-way stopcock
- needle-free injection port for IV fluid, such as Ultrasite
- adhesive dressing
- paper tape
- towel
- chlorhexidine gluconate sponge dressing, such as Biopatch
- food coloring or simulated blood
- central line
Steps to Creating the Solution
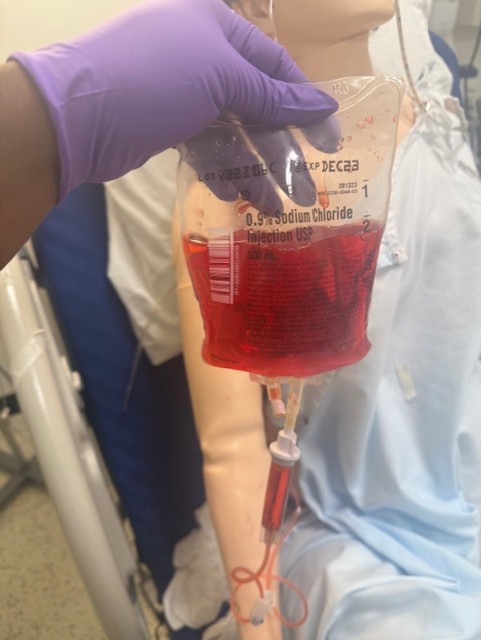
1. Add simulated blood or food coloring to the fluid bag until the desired color is achieved. If students will be performing an IV push or IV fluid infusion into the line, consider removing 100-200cc from the bag first.
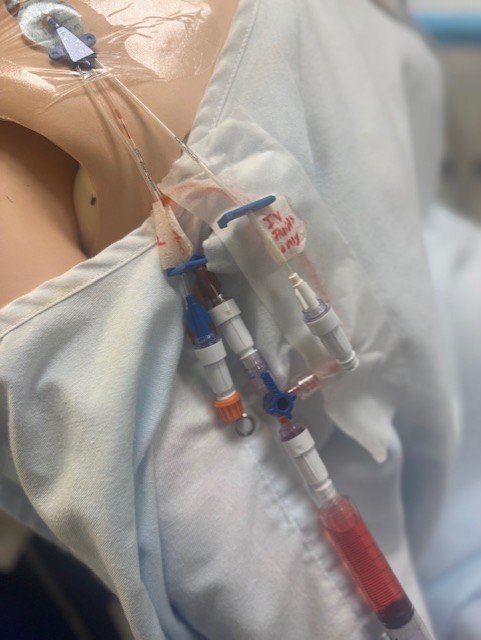
2. Prime the line using secondary tubing. Attach the tubing to right side of the 3-way stopcock.
3. Attach a needle-free injection port for IV fluid, such as Ultrasite, to the bottom of the 3-way stopcock. Ensure the stopcock is pointing upright to prevent fluid from flowing through the actual central line.
4. Attach the central line port to the top of the 3-way stopcock. Check that the stopcock dial is pointed upward toward the central line.
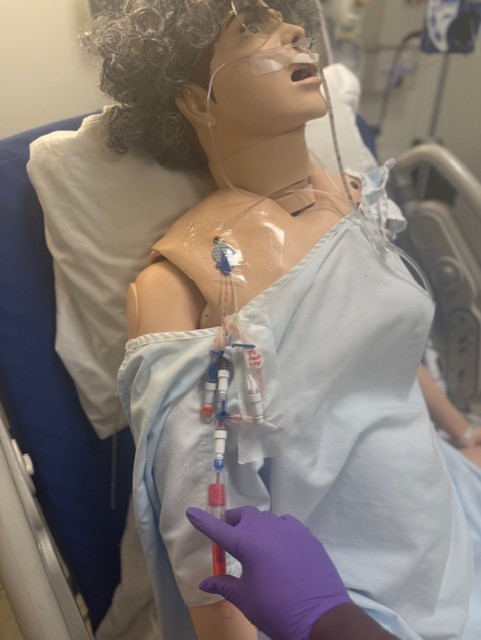
5. Secure the central line to the manikin in the desired location. Apply a chlorhexidine gluconate sponge dressing, such as Biopatch, and adhesive dressing.
6. Ensure the IV bag is upright and positioned beside the manikin. Cover the bag and line with a towel to conceal them.
7. Some of the second tubing may be visible on the right side of the stopcock. Use paper tape to cover and secure it to the manikin’s garments to hide the line. The central line is now ready to use. Remind students not to turn the stopcock when using the central line.
8. If a double or triple lumen central line is used, students should avoid infusing fluids into lumens that are not properly diverted, as this may cause leakage through the actual line. If fluid administration is desired through multiple lumens, consider creating an additional diversion using the same method described above. An empty IV bag can be used to safely collect the fluid.
Images
Video
HomeGrown Disclaimer
The information contained within this website is for information purposes only. While the website is monitored in an attempt to keep the information up to date and accurate, be aware that there are no representations or warranties of any kind, express or implied, about the completeness, accuracy, reliability, and/or suitability being made. The sponsors of this website are not liable for any loss or damage that may result from using information contained within this website. Any reliance you place on the information contained within this website is strictly at your own risk.
Please note that sections of this website include postings of individuals not associated with the website sponsors. These postings are not endorsed or warrantied by the website, and use of such information is at your own risk.
Always check the user guide/manuals provided by the manufacturer of your manikin or task trainer. Using products that are not sanctioned may invalidate the product warranty. (For example: Some products could stain the skin on a manikin. Liquids used around electrical parts may cause malfunctions.)