
HomeGrown Solution: IV Arm for Fluid Infusion
Title
IV Arm for Fluid Infusion
Submitted by
Kelly Hogeland Elrod
HomeGrown Solution Number
Category
Identification of the Problem
At our simulation center, we do not have staff available to charge and clean manikins after they have fluids infused thru them. We plugged bags with wax to allow students to spike the bag, but that did not allow students to practice priming the tubing or programming the pump.
Unique Idea
Using a series of tubing and 3-way stopcocks on a phlebotomy arm, students can start an IV, spike the bag, prime the tubing, and program the pump without the need to charge and clean a manikin after the fluids are infused through them. This solution is ideal for simulations that require IV fluids.
Objectives
- Students will demonstrate critical thinking in troubleshooting common IV infusion pump issues (e.g., alarm troubleshooting, flow rate discrepancies).
- Students will demonstrate the ability to properly program an IV infusion pump, including setting the correct flow rate, dose, and time parameters according to the prescribed order.
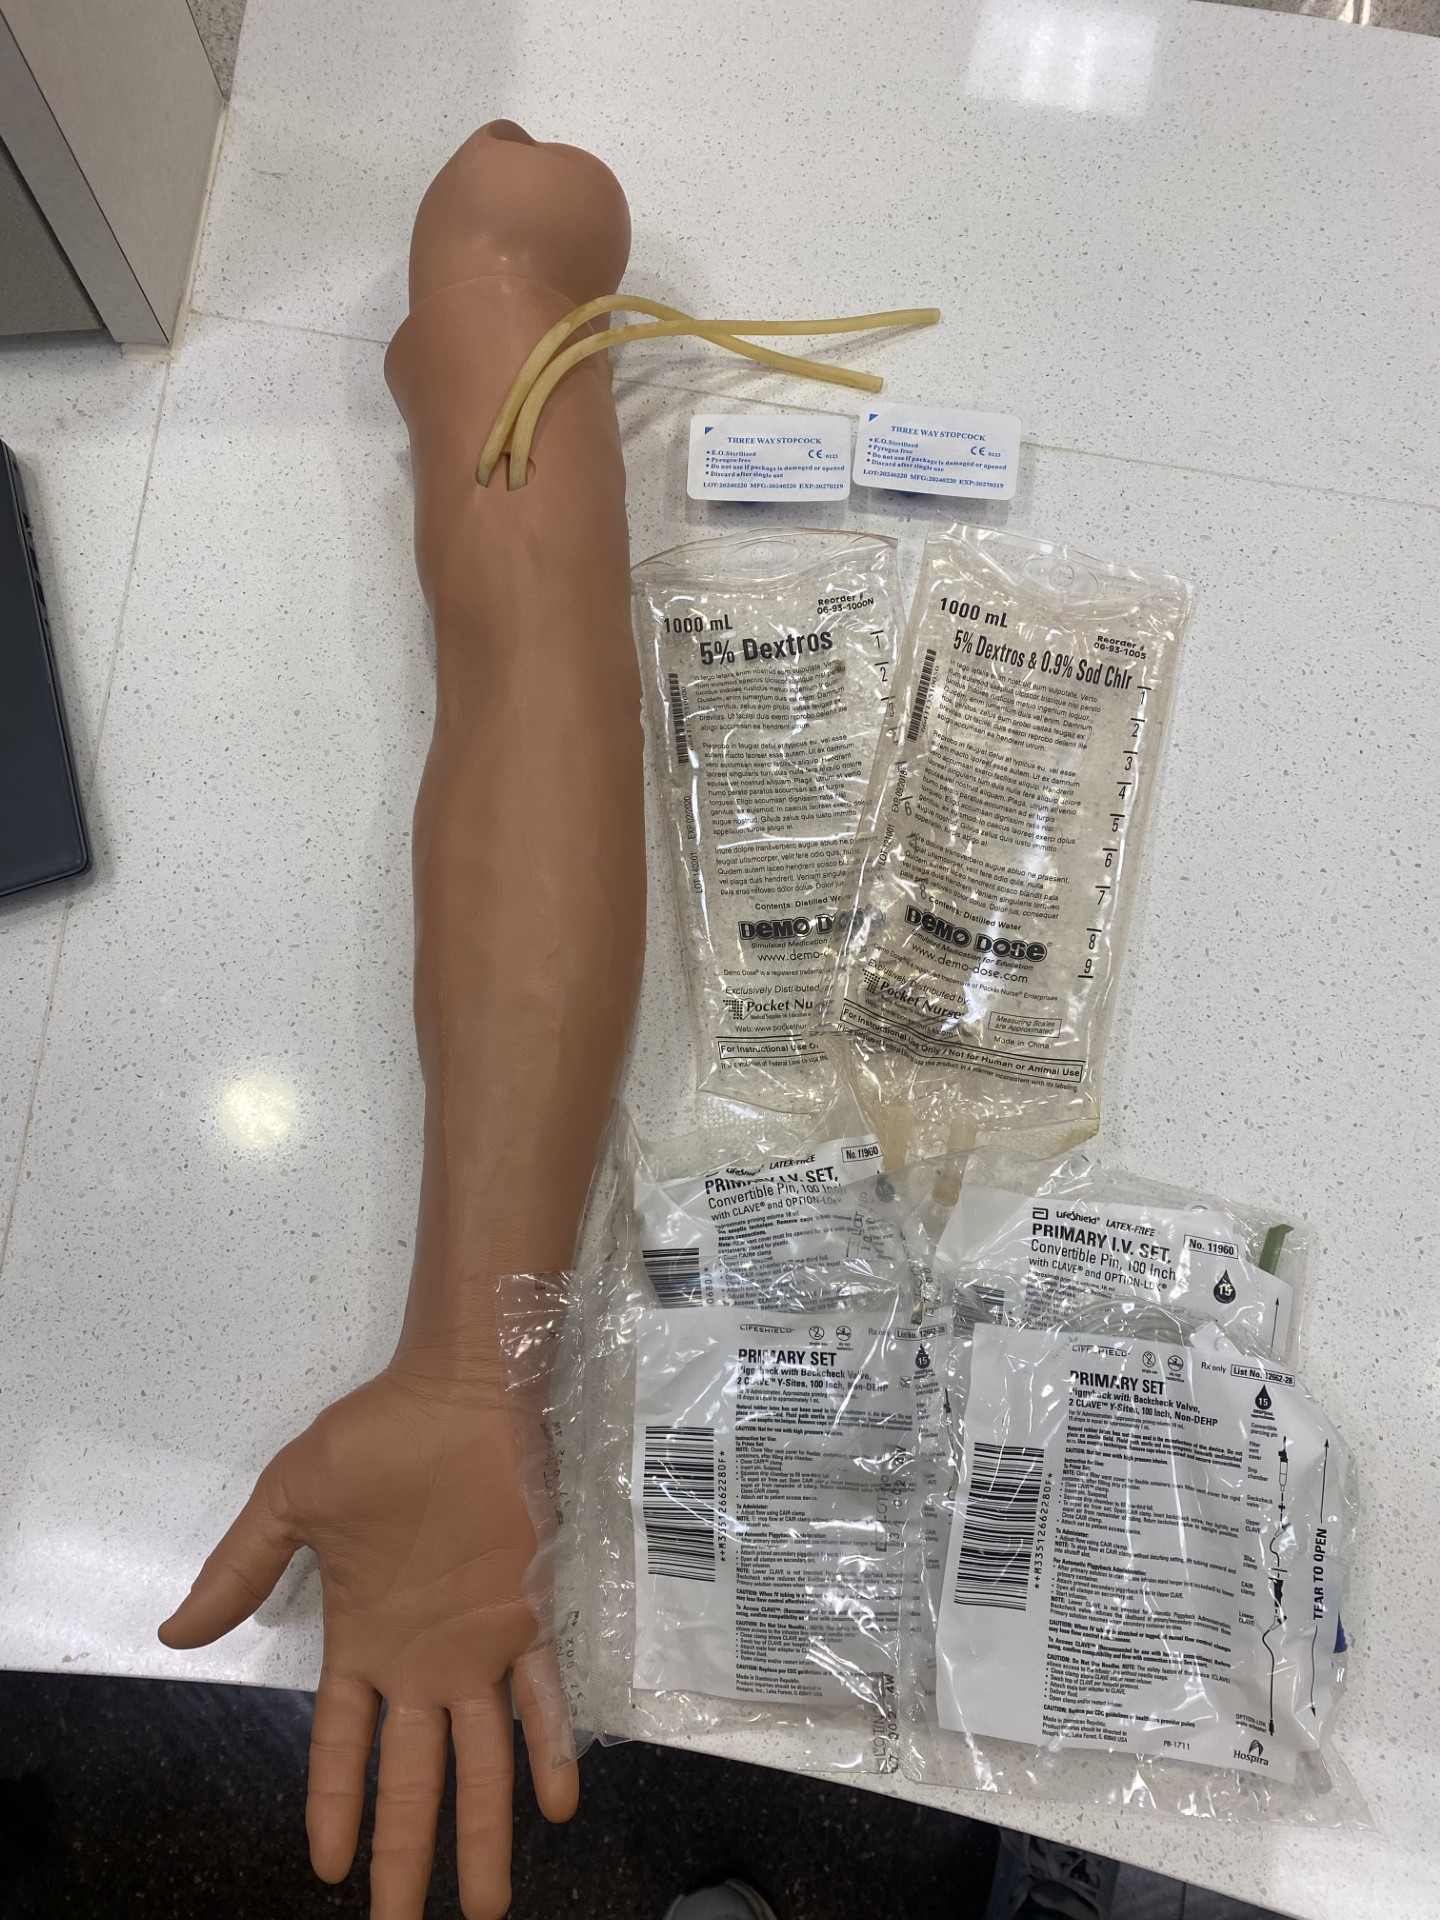
Supplies/Ingredients
- Phlebotomy arm with tubing or arm with tubing
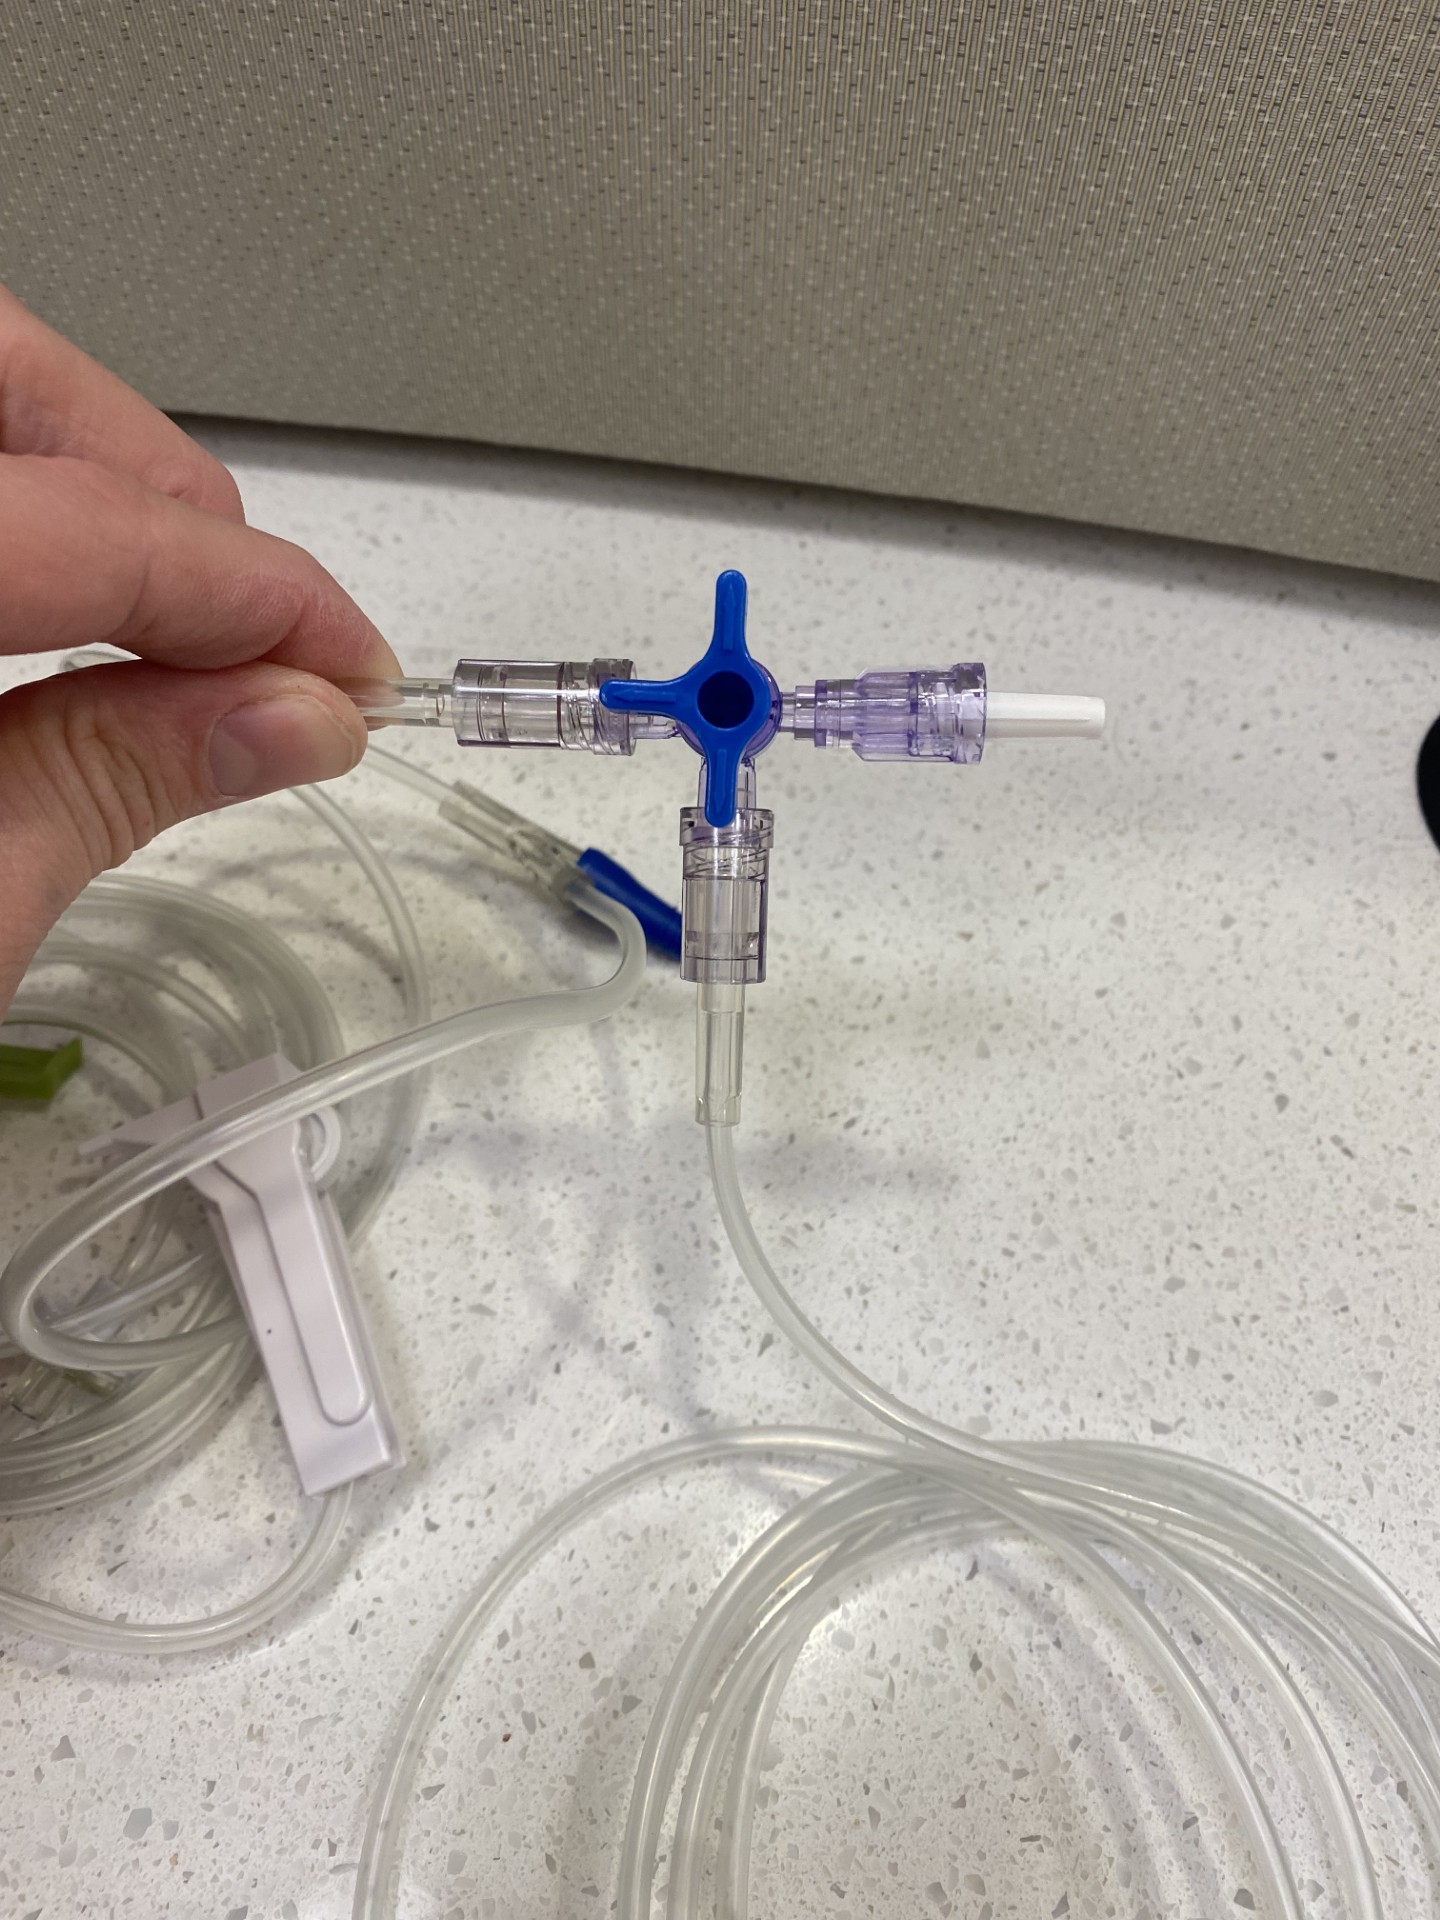
- Two 3-way stopcocks
- 4 sets of IV tubing without cartridges
- 2 empty IV bags
- Zip ties (optional)
Steps to Creating the Solution
- Gather supplies: phlebotomy arm with intact tubing that acts as veins, stopcocks, IV tubing sets, IV bags, and zip ties.
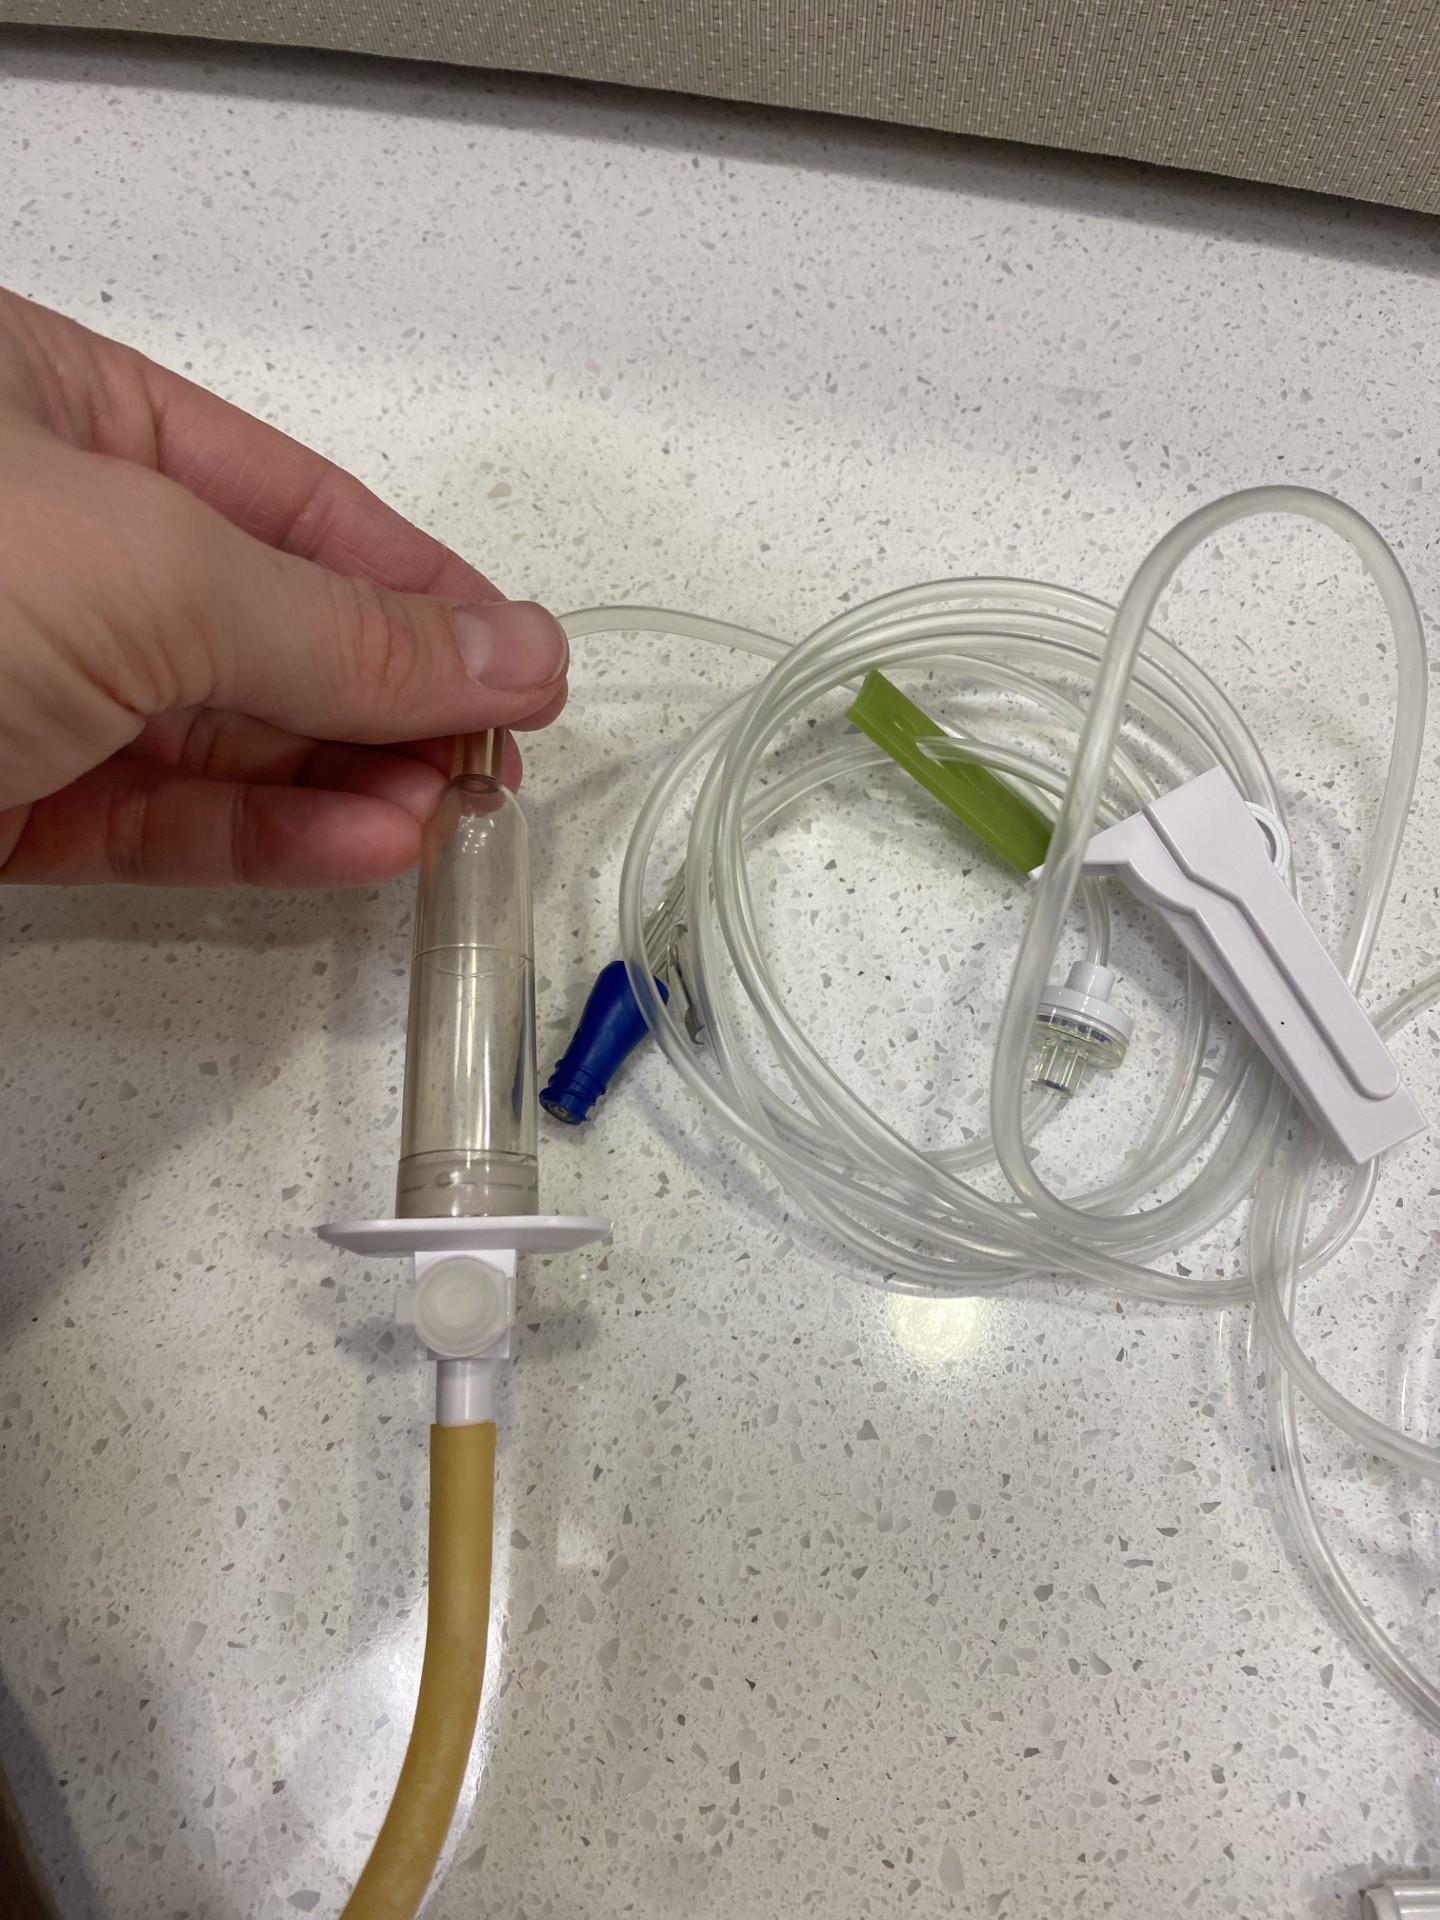
- Insert spike of IV tubing into exposed tubing in the phlebotomy arm.
- Attach luer lock stopcock to luer lock end of IV tubing.
- Attach luer lock end of second IV tubing to luer lock stopcock.
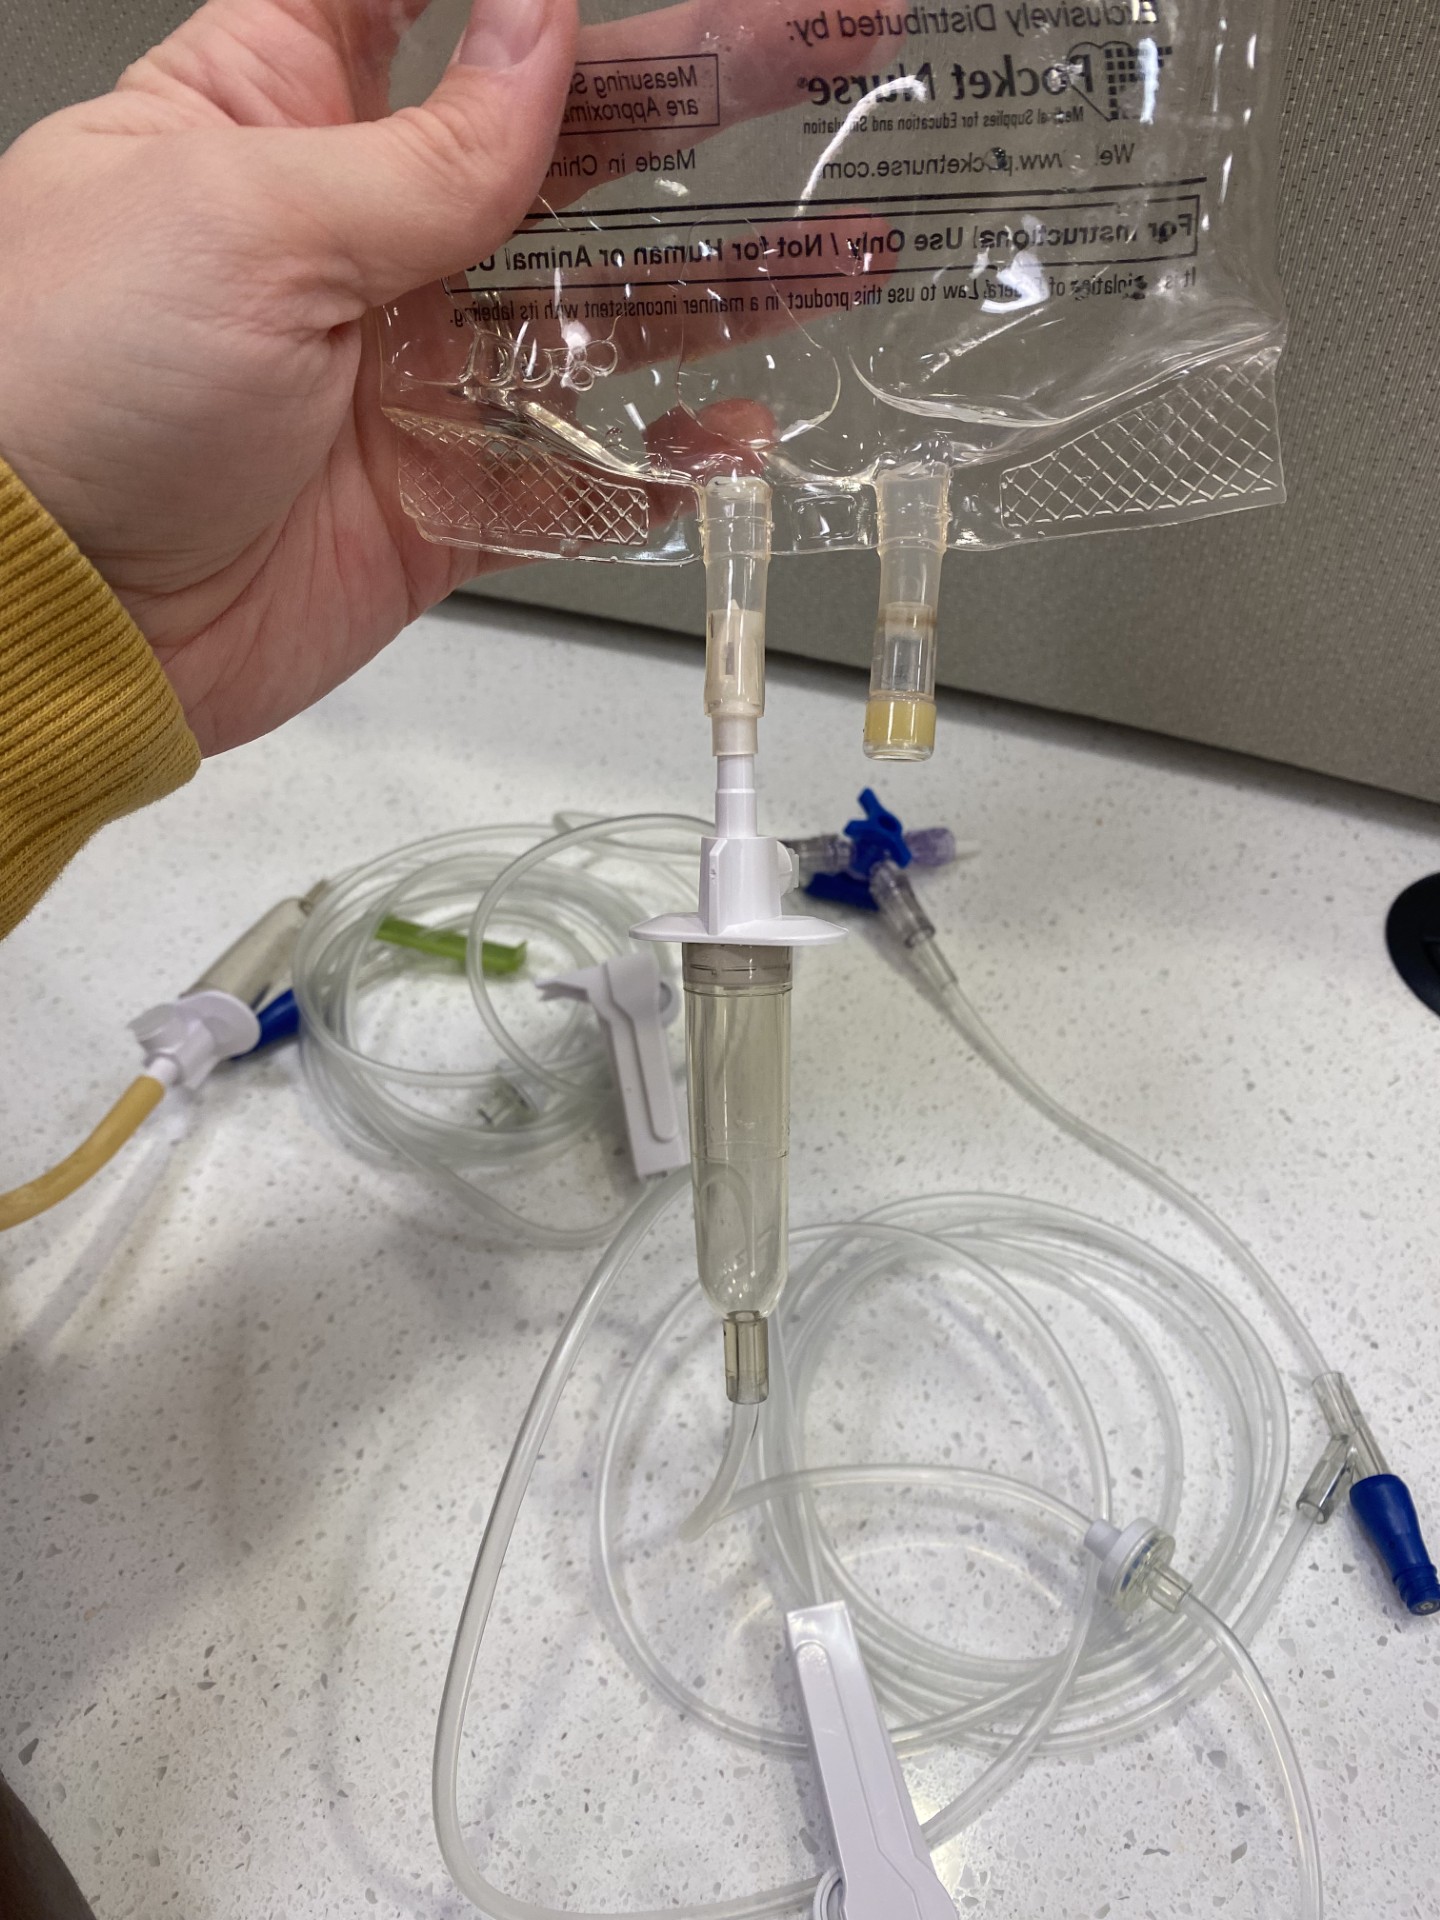
- Spike empty IV bag to the end of the second tubing.
- Ensure stopcocks are turned open to the arm and open to the IV bag but closed to extra port. Ensure all clamps are open.
- (optional) Zip tie extra tubing together to create a cleaner look.
- Repeat steps 2-7 for the second tubing in the arm.
Image

Video
HomeGrown Disclaimer
The information contained within this website is for information purposes only. While the website is monitored in an attempt to keep the information up to date and accurate, be aware that there are no representations or warranties of any kind, express or implied, about the completeness, accuracy, reliability, and/or suitability being made. The sponsors of this website are not liable for any loss or damage that may result from using information contained within this website. Any reliance you place on the information contained within this website is strictly at your own risk.
Please note that sections of this website include postings of individuals not associated with the website sponsors. These postings are not endorsed or warrantied by the website, and use of such information is at your own risk.
Always check the user guide/manuals provided by the manufacturer of your manikin or task trainer. Using products that are not sanctioned may invalidate the product warranty. (For example: Some products could stain the skin on a manikin. Liquids used around electrical parts may cause malfunctions.)