
HomeGrown Solution: Fill Station for IVs and Flushes
Title
Submitted By
HomeGrown Solution Number
Category
Identification of the Problem
Unique Idea
Objectives
Reduce waste: Minimize the disposal of single-use IV bags and flushes.
Cost effective: Lower the costs associated with purchasing new IV bags and flushes.
Sustainability: Promote environmentally friendly practices withing the simulation setting.
Practicality: Ensure the refill process is straightforward and can be easily integrated into existing simulation workflows.
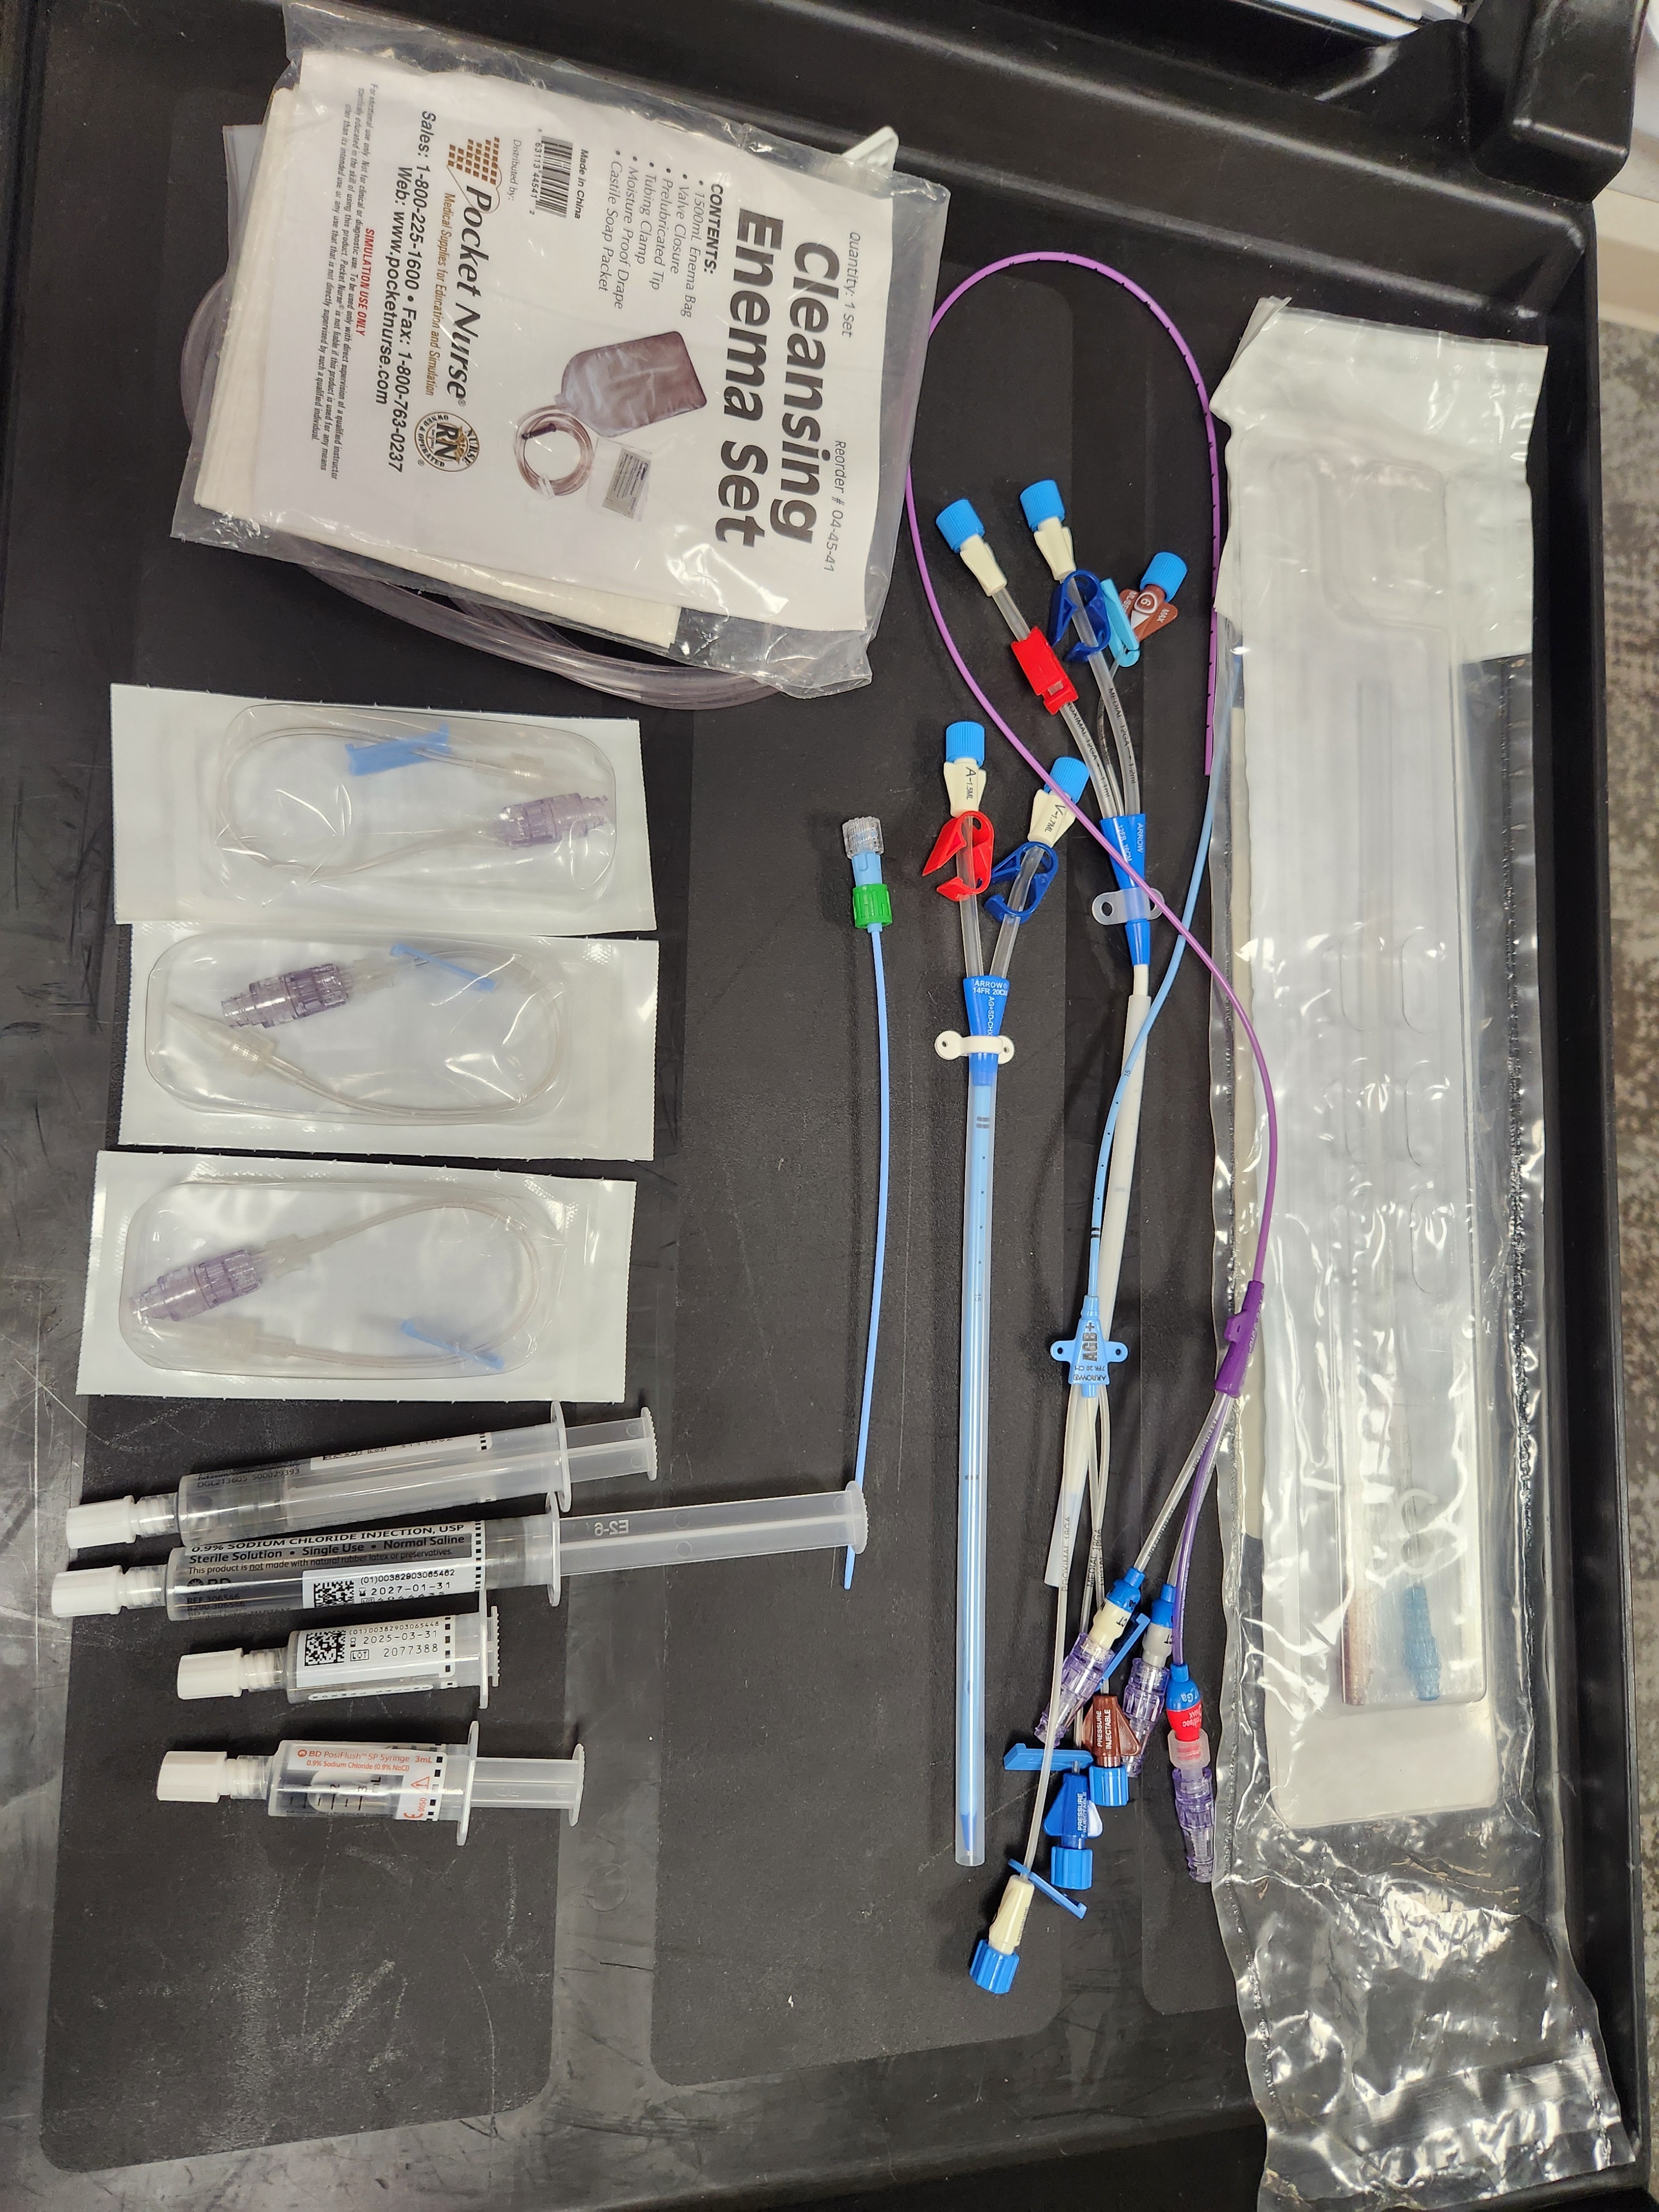
Supplies/Ingredients
- enema bags
- central line of PICC line of choice
- extension set (1 per port)
- distilled water
- empty flushes with caps
- ENFit connector
- IV bag with cap
- glue (optional)
Steps to Create the Solution
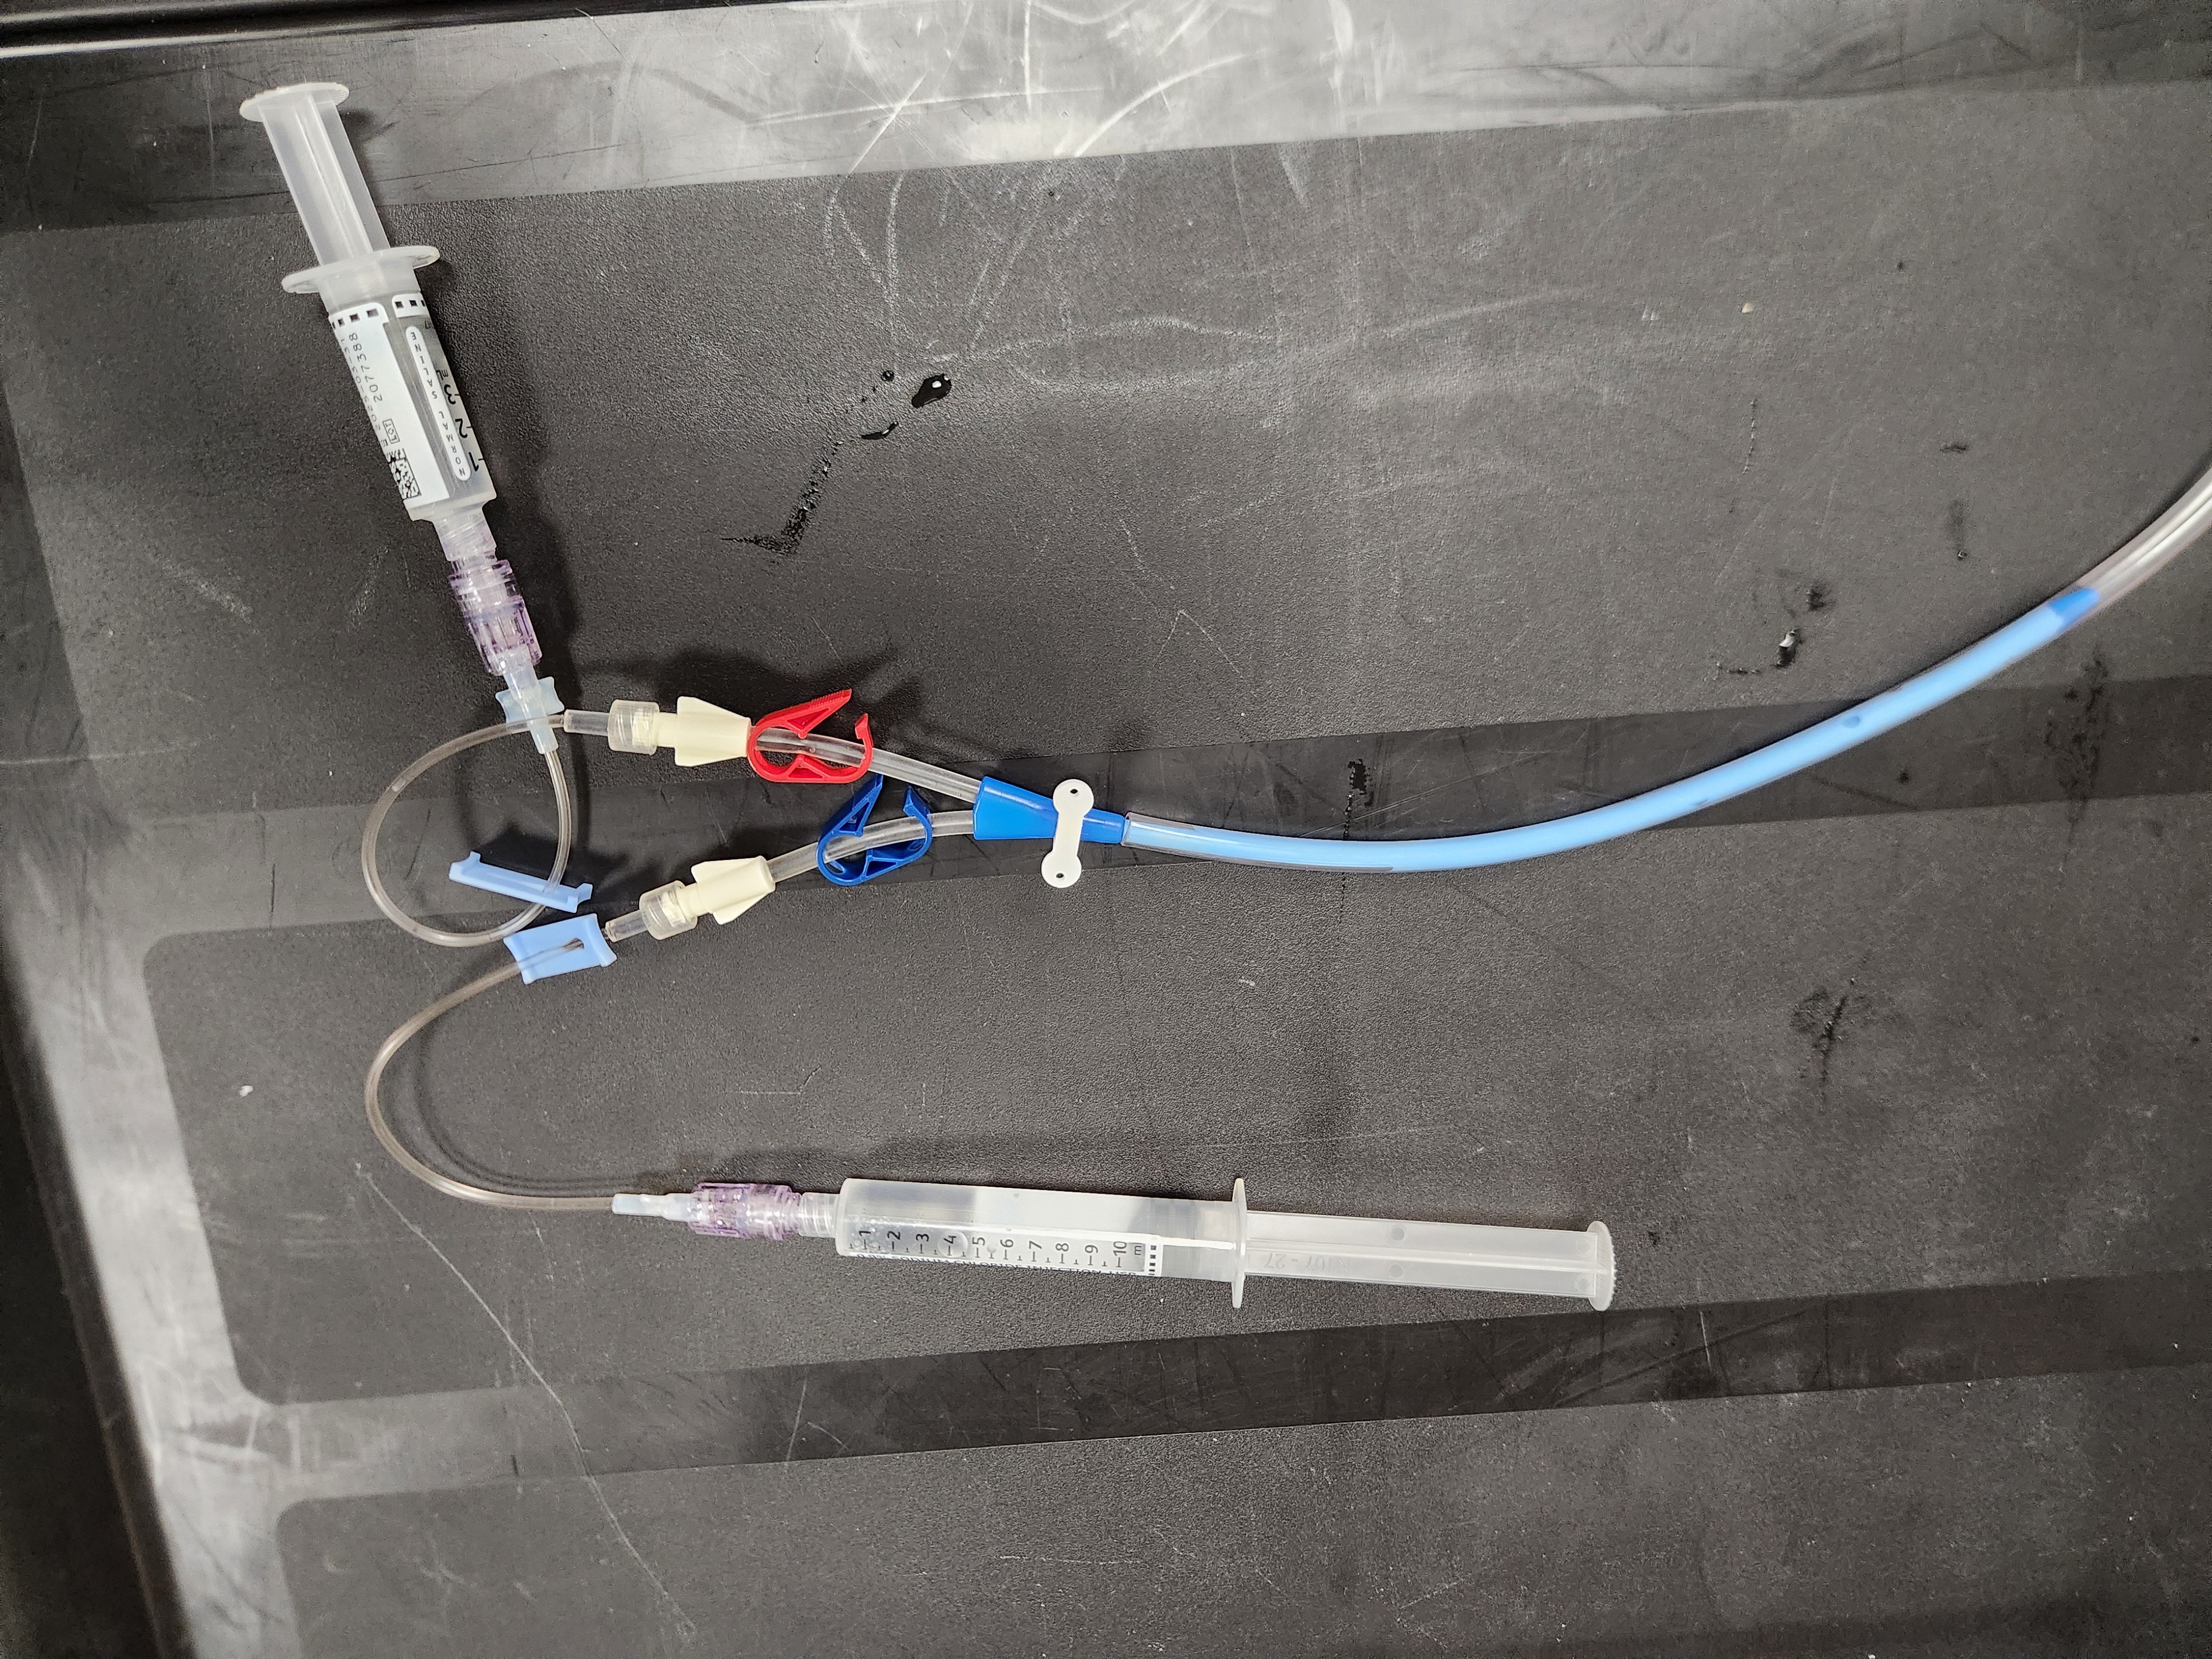
1. Preparation for Refilling Flushes: Gather the necessary supplies including the enema bag, central line, extension tubing, distilled water, and empty flushes with caps.
2. Setup: Clip a few inches off the tip of the enema tubing.
3. Place the top of the chosen central line/PICC line into the end of the enema tubing ensuring that it fits snuggly so that it doesn’t leak. Secure with glue if needed to seal the connection.
4. Connect an extension tip to the port of the central line / PICC line. It is optional to connect multiple extension sets to any other available ports. Using the extension set allows the system to be a closed system eliminating a need to clamp anything off between refills.
5. Place distilled water in the enema bag and check for leaks. Connect a flush to the end of the secondary tubing and pull back the handle. You may need to disconnect the flush a few times and release the air from the flush until the enema line is primed for continual use.
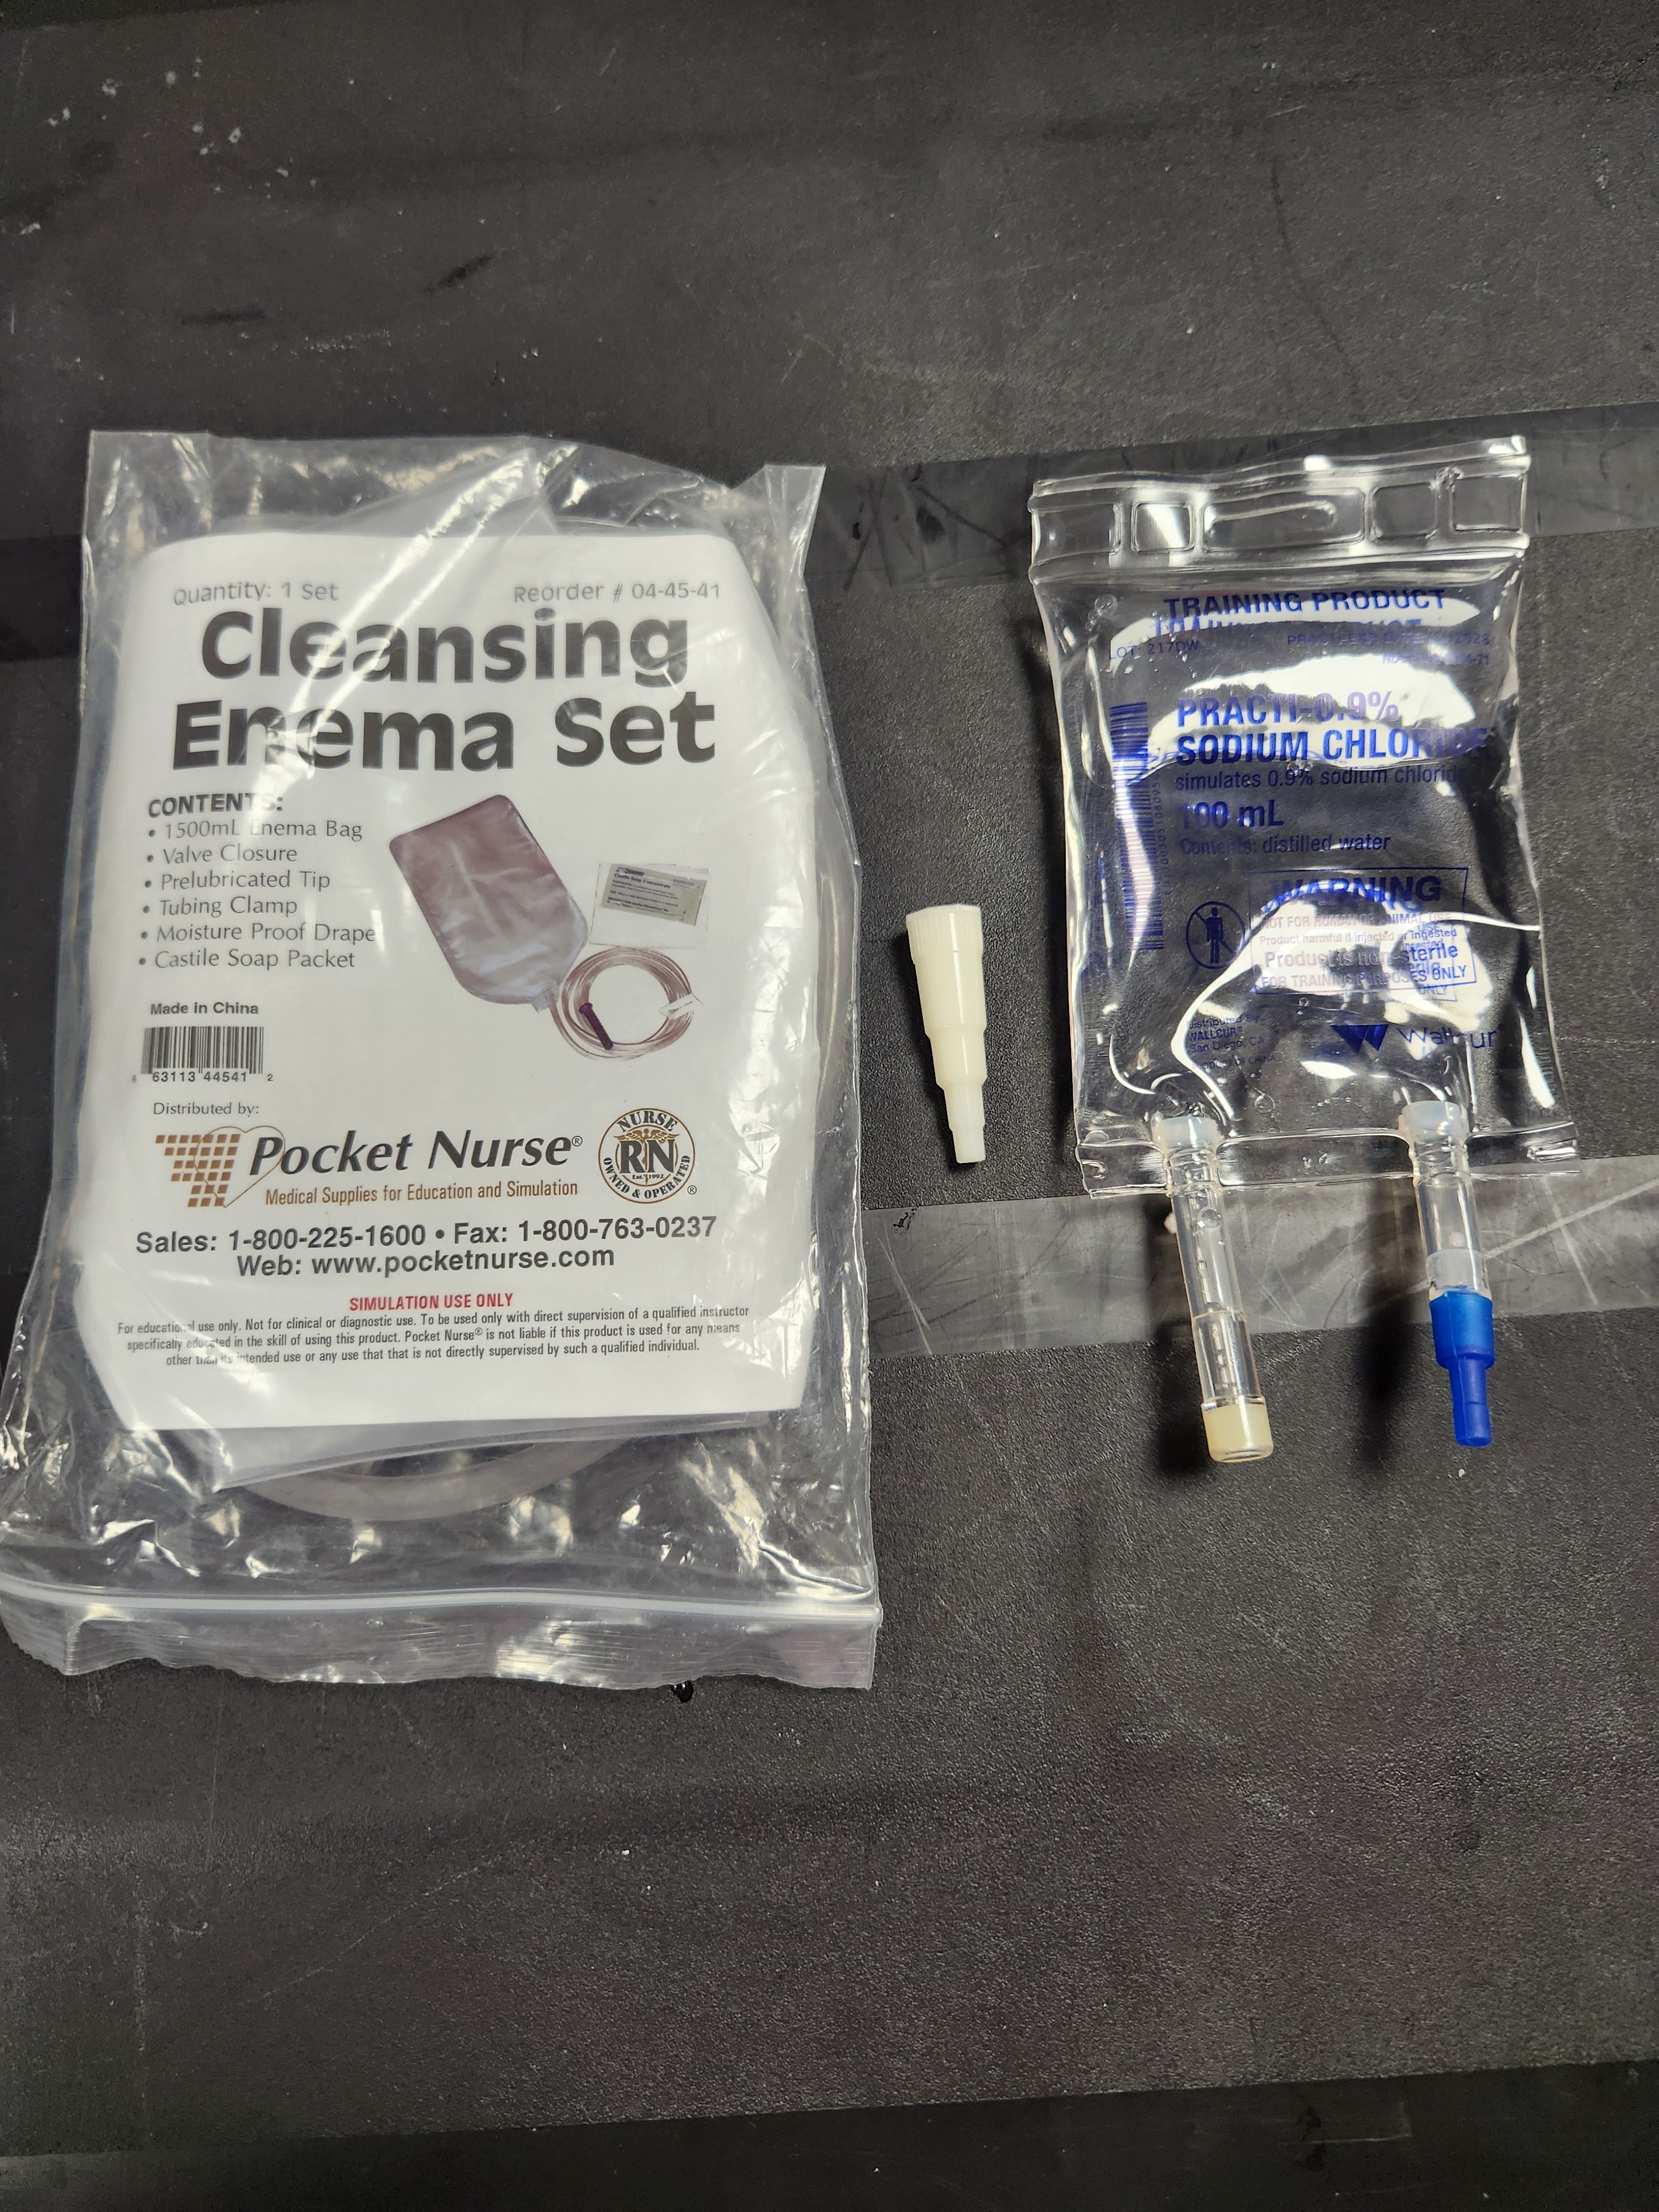
6. Preparation for refilling IV bags: Gather the necessary supplies including an enema bag, ENFit connector, distilled water, IV bag, and IV bag cap.
7. Setup: Clip a few inches off the tip of the enema tubing.
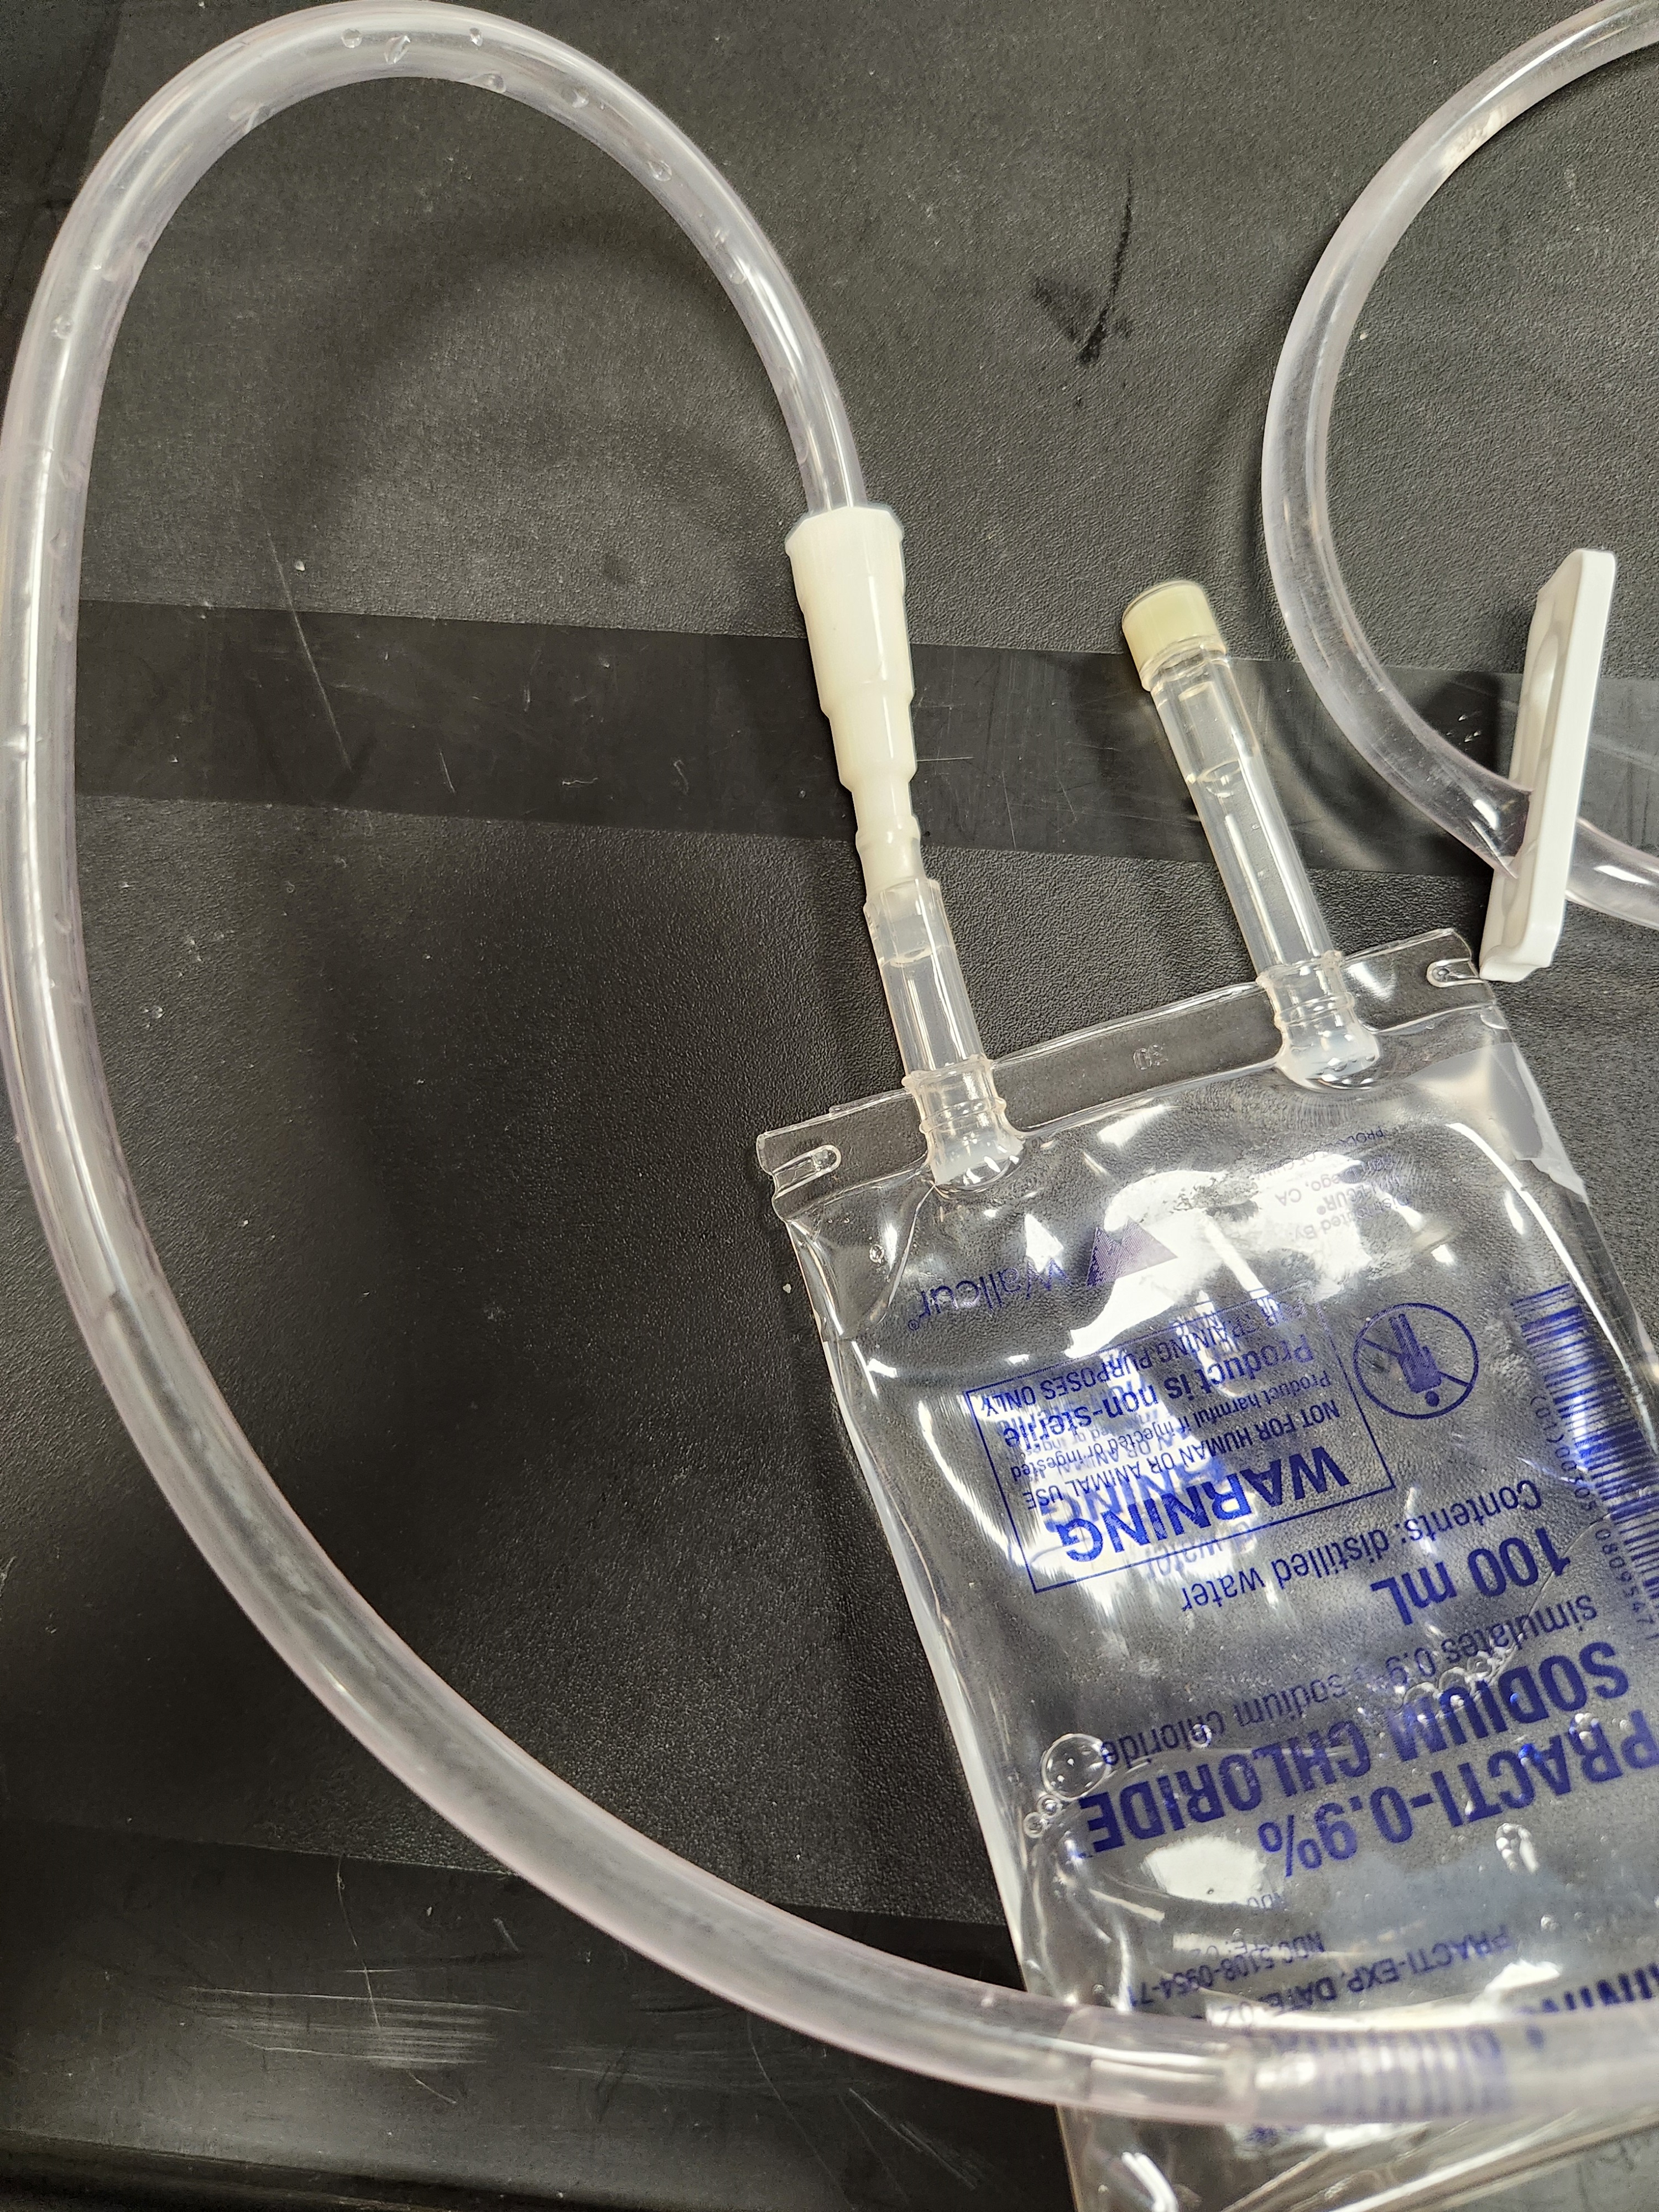
8. Place the ENFit connector on the end of the enema bag tubing. Be sure it is snug to prevent leaking. Secure with glue if needed to seal the connection.
9. Be sure the enema bag is clamped. Placed distilled water in the enema bag.
10. Place the ENFit connector into the port of the IV bag to transfer water from the enema bag to the IV bag. Clamp off the enema tubing when IV is filled to the desired amount. Replace the IV cap on the bag and it is ready for reuse.
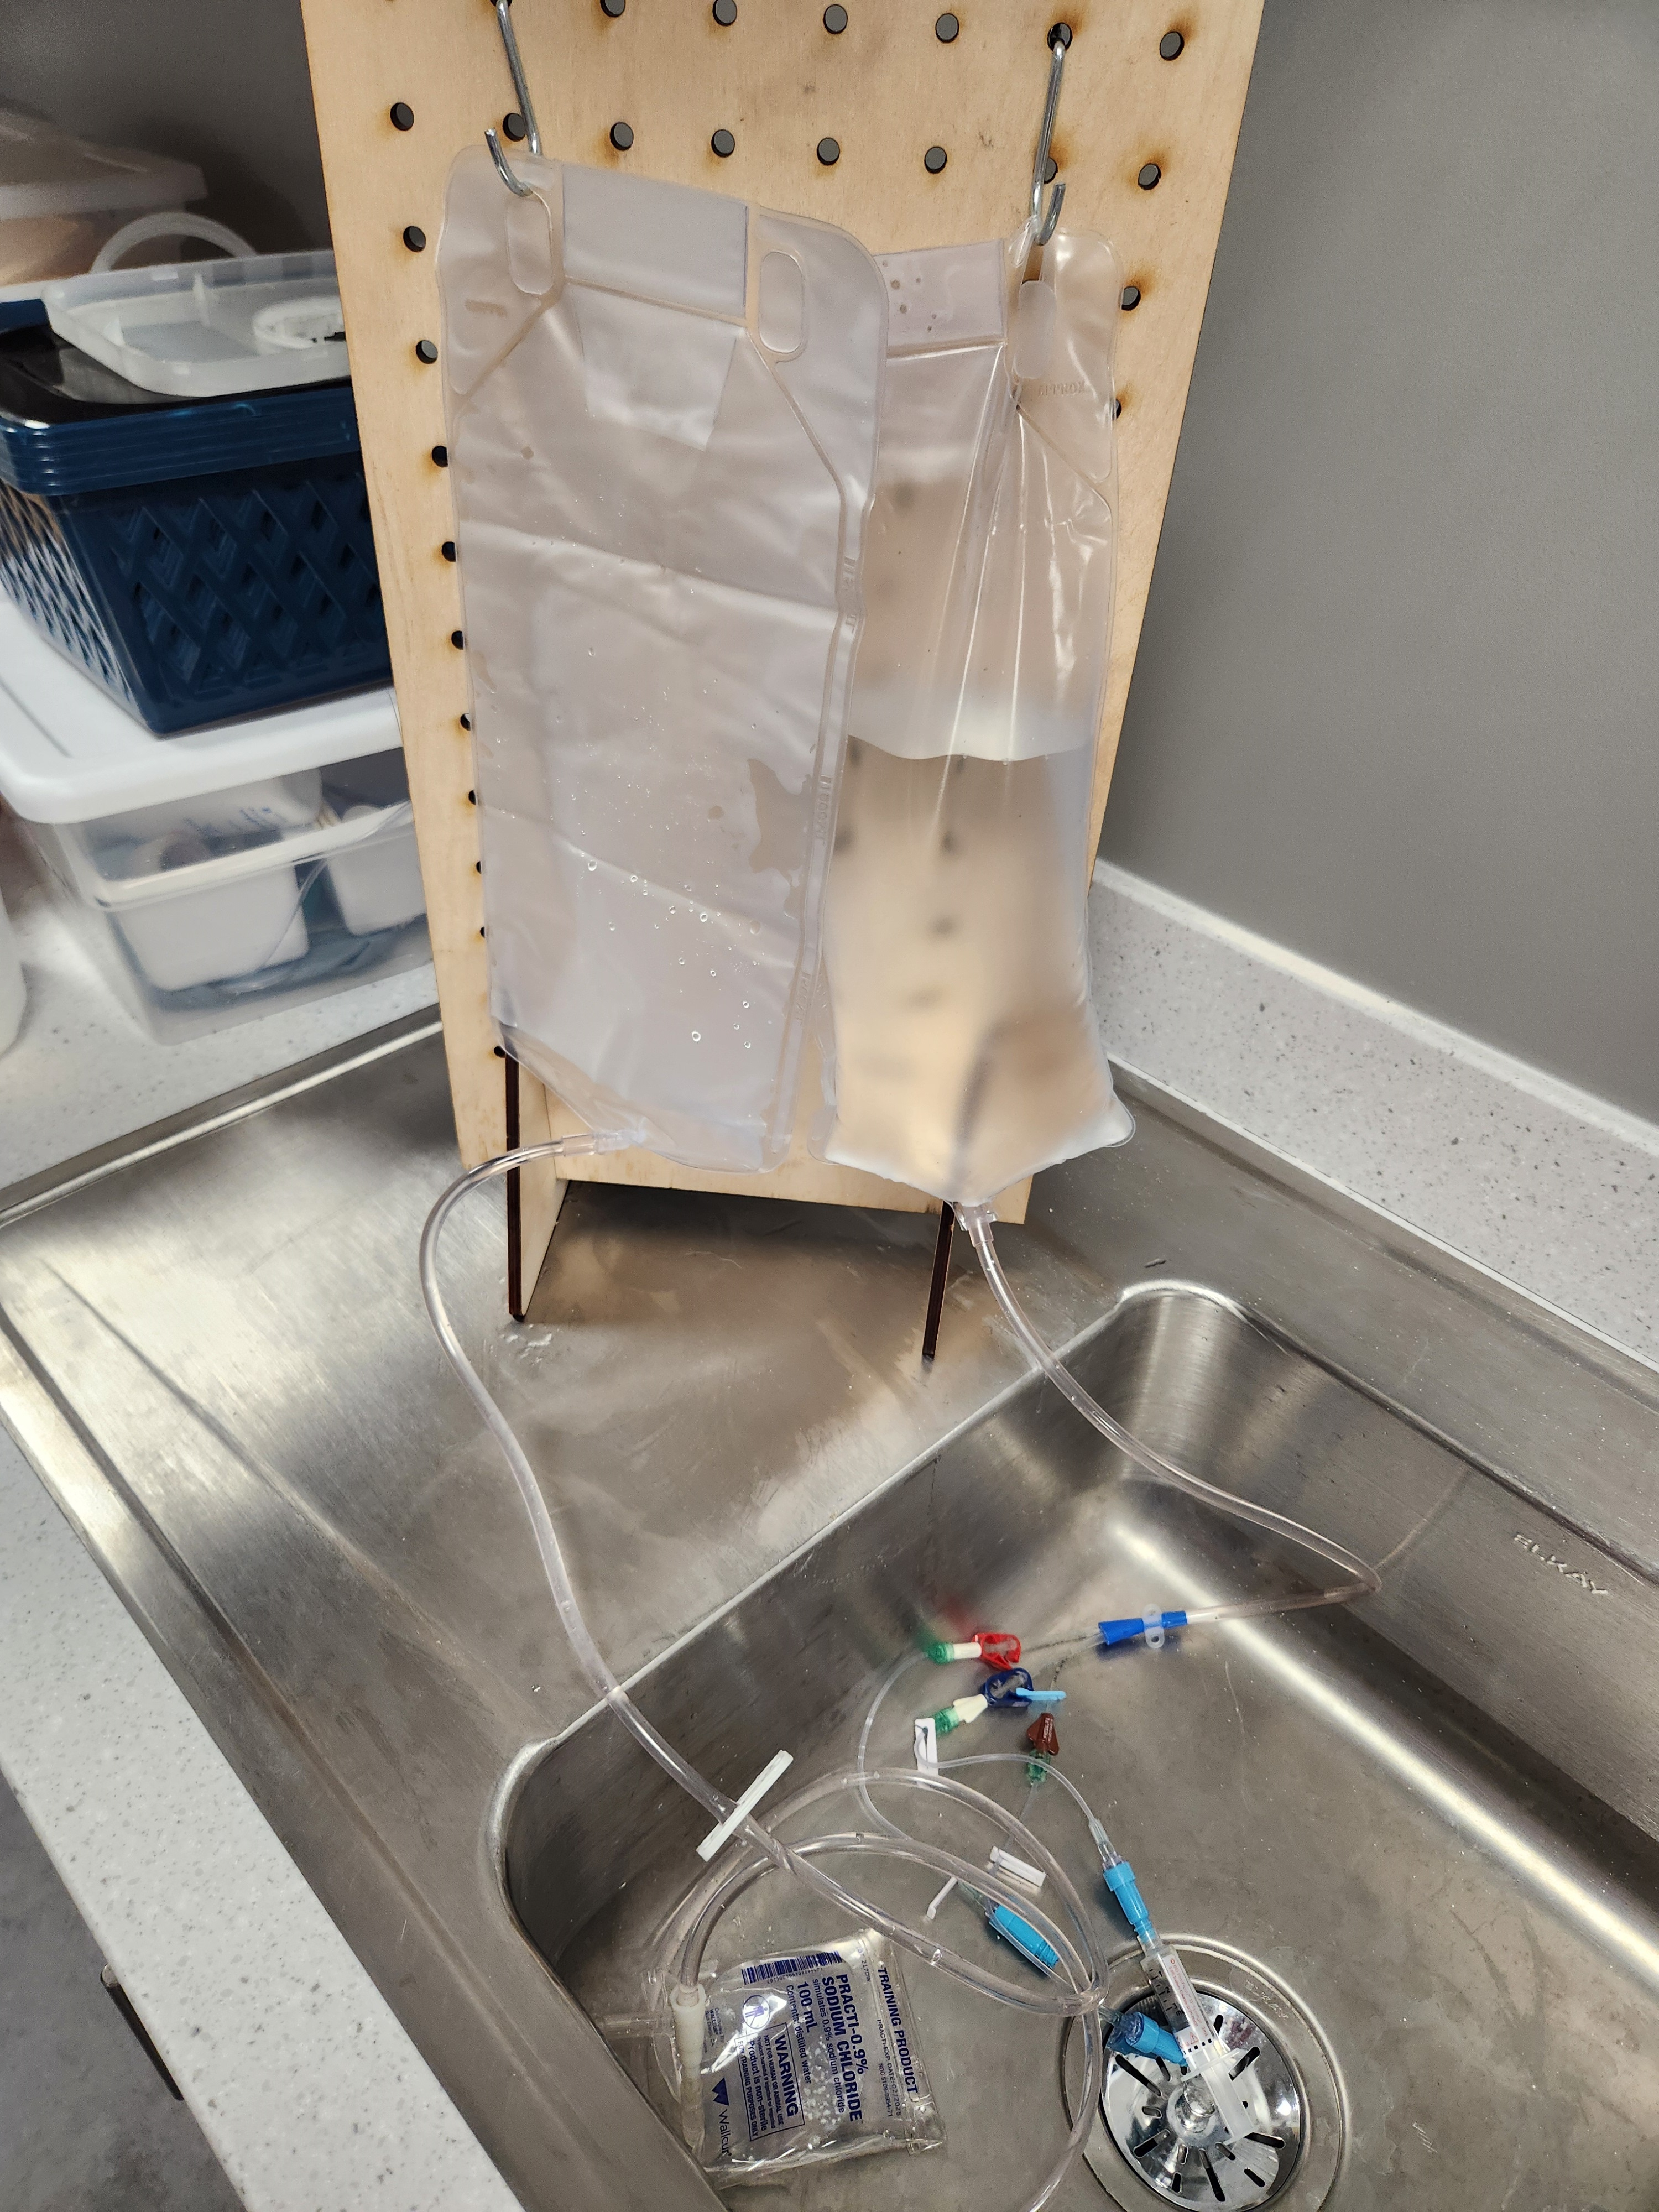
Images
HomeGrown Disclaimer
The information contained within this website is for information purposes only. While the website is monitored in an attempt to keep the information up to date and accurate, be aware that there are no representations or warranties of any kind, express or implied, about the completeness, accuracy, reliability, and/or suitability being made. The sponsors of this website are not liable for any loss or damage that may result from using information contained within this website. Any reliance you place on the information contained within this website is strictly at your own risk.
Please note that sections of this website include postings of individuals not associated with the website sponsors. These postings are not endorsed or warrantied by the website, and use of such information is at your own risk.
Always check the user guide/manuals provided by the manufacturer of your manikin or task trainer. Using products that are not sanctioned may invalidate the product warranty. (For example: Some products could stain the skin on a manikin. Liquids used around electrical parts may cause malfunctions.)